
Automating things is fun, so I decided to spend a day to build a Twitter bot (@daily_axc) that posts a random article. The sources for the daily article will be astralcodexten.substack.com (ACX) and slatestarcodex.com (SSC). These two blogs by Scott Alexander are by far my favorite source of insight on the internet I highly recommend them.
This article explains step by step how you can create such a bot on your own. It is more geared towards beginners. So if you just want to take a shortcut, just have a look at the code . Here is the outline:
- Setting up python
- Setting up Twitter
- Writing the python code
- Setting up the project structure
- Accessing the Twitter API from python
- Scraping the two websites
- Scraping Slate Star Codex
- Scraping Astral Codex Ten using Selenium
- writing a tweet
- Putting it all together and posting a tweet
- Automating the task using cron to post a daily tweet
Sources: This project was inspired by the Daily R Sheet Twitter Bot and its code. I also looked at this and this.
Note: I’m using Linux on my computer, so some of the steps (but not the actual coding) may differ if you’re on Windows.
1. Setting up python
I assume you are vaguely familiar with python and have it installed on your computer. As a coding environment for this project I used Visual Studio Code, but none of what follows relies on it (you can actually just use plain text files).
I created a fresh directory for my bot and in it created a virtual python environment using venv that I called ‘twitter-bot’ (we could have just called it env or something else).
To do that I ran the following in the command line from my project directory:
python3 -m venv twitter-botThis creates a directory that has all the necessary files and folders for your virtual environment. Normally, VS Code should automatically activate the environment, but that somehow didn’t really work on my machine, so I just ran
source twitter-bot/bin/activatein the command line to activate it.
To verify python is actually using your virtual environment, you can run
pip --versionwhich should return something that includes the path to your virtual environment.
2. Setting up Twitter
I set up a new Twitter account for my bot. Unfortunately, you can’t reuse the same email address for two accounts. But since I have a gmail address, I could easily use the following hack: Google ignores random dots that you put in your email address. So every email sent to “hel.lo.12.3@gmail.com” will automatically be sent to hello123@gmail.com“. All I therefore had to do to ‘create a new email address’ was place a random dot in my existing email address and Twitter was happy.
Now in addition to the Twitter account you need access to the Twitter API, which means you must apply for a developer account. This is a very simple process that is in detail explained here.
I applied for an account as a hobbyist and selected ‘Make a bot’ as my goal. You need to write a couple of lines what you intend to do and are all set to go.
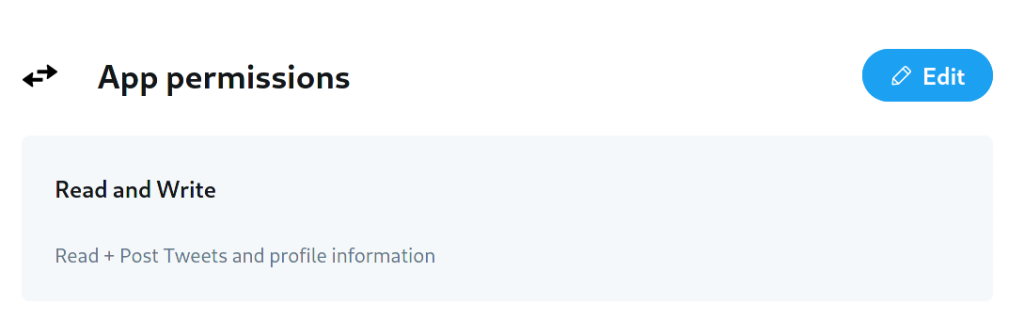
Once that is done you have to create an app and give it a name. In App Settings you can edit the App permissions which need to be set to “Read and Write”.
When you scroll back up you can go the the ‘Keys and tokens tab’.

There, you need to create an Access Token and a Secret. Copy and save these. You also need your API key and Secret (the Consumer Keys). Once you have these four keys and you have set the permissions to read and write, your good to go.
3. Writing the python code
3.1. Set up the project structure
For our project, we’re going to set up three files. We name the first file create_api.py. This code will care of the connection to Twitter. The second one is randomarticle.py. This will extract a list with all articles from Slate Star Codex and Astral Codex Ten and return a random link. The last one, main.py will put all the pieces together.
If this is easier for you, you can also just look at my code on github and clone the repository or look at the original R daily cheat sheet bot.
3.2. Access the Twitter API from python
The following code will let you access the Twitter API from python and you can copy it into your create_api.py file:
import tweepy
import logging
from dotenv import load_dotenv
import os

logger = logging.getLogger()


def create_api():
    logger.info("Loading environment variables")
    load_dotenv()
    consumer_key = os.getenv("CONSUMER_KEY")
    consumer_secret = os.getenv("CONSUMER_SECRET")
    access_token = os.getenv("ACCESS_TOKEN")
    access_token_secret = os.getenv("ACCESS_TOKEN_SECRET")

    logger.info("Initialising Twitter API")
    auth = tweepy.OAuthHandler(consumer_key, consumer_secret)
    auth.set_access_token(access_token, access_token_secret)
    api = tweepy.API(
        auth, wait_on_rate_limit=True,
        wait_on_rate_limit_notify=True)
    try:
        api.verify_credentials()
    except Exception as e:
        logger.error("Error creating API", exc_info=True)
        raise e
    logger.info("API created")
    return api
Let’s go through it in more detail. The first thing we do is importing the modules we need for the code. If some of the modules aren’t installed yet, you need to install them in your virtual environment by executing, for example
pip install tweepyEverything that has logging or logger in it is not strictly necessary, but is helpful to store error messages to a log file. We’ll return to the logs later and can ignore that for now.
The function load_dotenv loads your credentials from a file called .env that is placed in the same directory in which you execute the code. We therefore need to create a text file called “.env”. In this file, we need to write our Twitter tokens and secrets:
CONSUMER_KEY="YOURCONSUMERKEY"
CONSUMER_SECRET="YOURCONSUMERSECRET"
ACCESS_TOKEN="YOURACCESSTOKEN"
ACCESS_TOKEN_SECRET="YOURACCESSTOKENSECRET"
If you sync your repository to git, make sure to add this file to your .gitignore file, as you don’t want to accidentally upload your secrets to the internet. Also note that this means that your Twitter credentials are stored on your hard drive in plain text! If you’re concerned about security, you may want to find a different way to do this. But for now, let’s keep it simple.
Now load_dotenv loads your keys to the environment and os.getenv() can read them from there. Using your keys we can set an auth object and use that to create the api object that will then be returned by the function.
If you want to test whether all is working, you can simply add a line with create_api() at the end of your file and then execute create_api.py. You should see no errors or warnings.
3.3. Scraping the websites to obtain a random link
Now we turn to the randomrticle.py file. The skeleton of this file looks like this:
import logging
from bs4 import BeautifulSoup
from urllib.request import Request, urlopen
from selenium import webdriver
from selenium.webdriver.firefox.options import Options
import time
import random

logger = logging.getLogger()


class randomarticle:
    ssc_url = "https://slatestarcodex.com/archives/"
    acx_url = "https://astralcodexten.substack.com/archive"

    def __init__(self):
        logger.info("Initialising random article")
        logger.info("Looking up the full list of Slate Star Codex articles")

        def get_ssc_links(self): ...

        logger.info("Looking up the full list of Astral Codex Ten articles")

        def get_acx_links(self): ...

        self.all_links = get_acx_links(self) + get_ssc_links(self)
        logger.info("Randomly selecting a link to post")
        self.link = random.choice(self.all_links)

    def write_tweet(self): ...
It consists of a bunch of modules and function that we load and of a class called randomarticle. The modules are needed to provide the functionality to scrape the websites and extract all available links. The randomarticle class structures this process. When we initialize the class (this will happen in the main.py file), the first thing that gets executed is the __init__ function. The init function does the following things:
- it creates two helper functions, to load all links from slatestarcodex.com and astalcodexten.substack.com. The code is currently hidden and will be shown later
- it executes both functions to get all links to articles from both sites
- it randomly selects one of these links and stores it in
self.link
The randomarticle class has a second method, write_tweet() that then uses the link stored in self.link to craft a tweet. This will be called in main.py later on.
Now, let’s look at the interesting bit: how we get scrape the sites to get the links.
3.3.1. Scraping slatestarcodex.com
Here is the function code for the get_ssc_links function:
def get_ssc_links(self):
    # load html and parse using bs4
    req = Request(self.ssc_url, headers={'User-Agent': 'Mozilla/5.0'})
    html_page = urlopen(req)
    soup = BeautifulSoup(html_page, "lxml")
    # create empty list with links and fill
    links = []
    for link in soup.findAll('a'):
        current_link = link.get('href')
        # check that the link satisfies some conditions
        condition = (
            (current_link is not None) and
            ("wp-login.php" not in current_link) and
            ("slatestarcodex" in current_link) and
            ("#comment" not in current_link) and
            ("open-thread" not in current_link) and
            ("open-thresh" not in current_link))
        if condition:
            # add more flltering to get rid of some summary page links
            manual_filter = [
                "https://slatestarcodex.com/",
                "https://slatestarcodex.com/",
                "https://slatestarcodex.com/about/",
                "https://slatestarcodex.com/archives/",
                "https://slatestarcodex.com/2021/",
                "https://slatestarcodex.com/2020/",
                "https://slatestarcodex.com/2019/",
                "https://slatestarcodex.com/2018/",
                "https://slatestarcodex.com/2017/",
                "https://slatestarcodex.com/2016/",
                "https://slatestarcodex.com/2015/",
                "https://slatestarcodex.com/2014/",
                "https://slatestarcodex.com/2013/"
                ]
            if current_link not in manual_filter:
                links.append(current_link)
    return links
The function does the following things:
- It uses the functions
Requestandurlopenfro theurllib.requestmodule to open the web page (using the URL stored inself.ssc_url). I added headers={‘User-Agent’: ‘Mozilla/5.0’} to the function call, which tells slatestarcodex.com which browser I’m using (This could be any browser name – I’m not actually using that browser). Without that argument slatestarcodex.com rejects the request, mistaking me for a suspicious bot – Which of course I’m not! - It uses the function
BeautifulSoupfrom the bs4 module to parse the website. For that to work I had to runpip install lxmlin addition to installing bs4 and stores the website information in an object calledsoup. - It creates an empty list,
links - It searches for all elements of the website (stored in
soup) that have the html tag “a”. Within those tags, it looks for the “href” attribute. In HTML, links can be recognized by the following structure:<a href = "https:/followtheargument.org">Check out this cool block!</a> - It makes sure the link it found satisfies some conditions and filters away all the links we may not want
- It appends the remaining list to our empty list of links. Once it’s done, it returns all links it found.
3.3.2. Scraping astralcodexten.substack.com
The same thing, unfortunately, does not work for astralcodexten.substack.com. When you open the Slate Star Codex archive site, it shows you a complete list with all past posts. When you do the same thing with Astral Codex Ten, you only see a few posts. When you scroll down, more posts get dynamically loaded using JavaScript.
A second issue makes scraping Astral Codex Ten more complicated: some posts are behind a paywall and we would like to filter out those before we tweet a random article.
Let’s look at the code for the get_acx_links function:
Step-by-step guide that explains how to create a Twitter bot that posts a random artcile from Astral Codex Ten or Slate Star Codex each day.def get_acx_links(self):
    # set up a headless selenium browser
    options = Options()
    options.headless = True
    self.driver = webdriver.Firefox(options=options)
    self.driver.get(self.acx_url)
    self.driver.maximize_window()
    # scroll to the bottom of the page
    # first get current scroll height
    last_height = self.driver.execute_script(
        "return document.body.scrollHeight")
    while True:
        # Scroll down to bottom
        self.driver.execute_script(
            "window.scrollTo(0, document.body.scrollHeight);")
        # Wait to load page
        time.sleep(3)
        # Calculate new scroll height and compare with last height
        new_height = self.driver.execute_script(
            "return document.body.scrollHeight")
        if new_height == last_height:
            time.sleep(10)
            break
        last_height = new_height
    # get the fully loaded page and parse it
    html_page = self.driver.page_source
    soup = BeautifulSoup(html_page, "lxml")
    links = []
    # find all div containers that are a post preview
    preview_class = "post-preview portable-archive-post "\
                    "has-image has-author-line"
    divs = [divs for divs in soup.findAll(
        "div", {"class": preview_class})]
    # iterate over all post previews to get the link and to
    # check whether the link is behind a paywall
    for div in divs:
        linkdiv = div.find(
            "a", {"class": "post-preview-title newsletter"})
        link = linkdiv.get('href')
        article_attributes = div.find(
            "table", {"class": "post-meta post-preview-meta custom"})
        paywalled = article_attributes.find(
            "td", {"class": "post-meta-item audience-lock"})
        if ((paywalled is None) and ("open-thread" not in link)):
            links.append(link)

    self.driver.close()
    return links
While the SSC function used Request and urlopen to load the website, this will only get us the first few links. The rest is loaded dynamically when you scroll down the page on Substack. We therefore have to think of something different. The solution I came up with is to let python open a browser, scroll down to the bottom of the page and then get the HTML of the fully loaded page. This is done using a module called selenium.
The first thing this function does is set up the selenium webdriver. The browser it uses needs to be actually installed on your system. In this case I’m using firefox, but you could also use Chrome instead or any other browser (just google ‘python selenium chrome’ for example). Using the options, I’m specifying this browser to be headless. This means that I don’t want python to open an actual browser when the code is executed. If you delete those lines and execute the code, an actual browser will open, navigate to the site and maximize the window.
After the webdriver is initialized it opens up astralcodexten.substack.com and scrolls down to the end of the page. The code on how to scroll down was taken from here.
To obtain the links we also need a bit more careful. While we could simply look for all “a” tags, as we did before, that wouldn’t tell us whether a link is behind a paywall or not. We therefore need to dig a bit deeper into how the website is structured. Let’s go to https://astralcodexten.substack.com/archive and open the developer tools (on my browser that’s CTRL+SHIFT+C).
We can see that for every post there is a post preview that lives inside a <div> and has the class “post-preview-content”
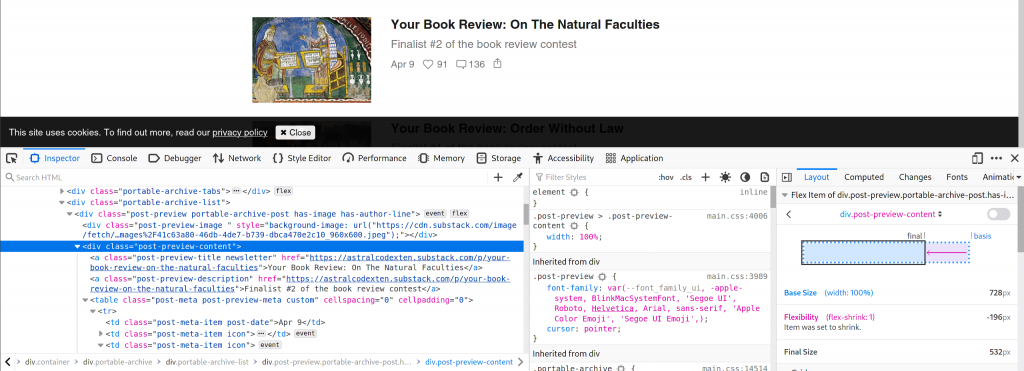
Let’s therefore first get all div containers and keep those that have the correct class. Within each of these divs, we find the “a” tag with the link and can extract that as we did before.
To find out whether or not a blog post is behind a paywall, we need to check whether there is a small lock beneath the article. This lock appears within a “table” and has a “td” tag with class “post-meta-item audience-lock”. If a link has that, we don’t want it.
If there is no paywall lock and the link is not an open-thread, we add it to our list of links. By looking only for the divs with the post-preview class we already got rid of any unwanted links, so we don’t have to do any filtering.
Finally, we need to close the webdriver (the browser we opened) and can return a list of all links.
3.4. Obtaining a random link and crafting a tweet.
The only thing left to do is to actually call these two functions we just defined and combine all links from both websites to a large list. Out of these links, one link gets randomly selected and stored as self.link.
Note that all of this happens within __init__, so it automatically happens, when we initialize the randomarticle class. The only thing that doesn’t happen automatically is creating the actual tweet. You could, of course, also move that to __init__, but for now it’s separated to make the code clearer.
The tweet is crafted using the write_tweet method. The code for this looks as follows:
def write_tweet(self): ...
    logger.info("Creating a message with the random article link")
    message = [
        "Here is your daily article from Astral Codex Ten "
        "/ Slate Star Codex:",
        f"{self.link}"
    ]
    message = " \n".join(message)
    return message
It uses the link stored in self.link (that gets created automatically when we initialize the randomarticle class) and uses it create a message. In this case, we’re creating a list first and are joining that together second to make it a bit more flexible, but in theory this could just be a simple string.
3.5. Putting it all together and posting a tweet.
Now that we got all pieces together we can put it together in the main.py file. Here is what this file looks like:
from create_api import create_api
from randomarticle import randomarticle
import logging

logging.basicConfig(
    filename='twitter-bot.log', encoding='utf-8', level=logging.DEBUG)
logger = logging.getLogger()


def post_tweet(event="", context=""):
    api = create_api()
    article = randomarticle()
    tweet = article.write_tweet()
    try:
        api.update_status(status=tweet)
    except Exception as e:
        logger.error("Error posting tweet", exc_info=True)
        raise e
    logger.info("Tweet successfully posted")


post_tweet()
This file does the following:
- It loads in our code as modules (to that end, create_api.py and randomarticle.py need to be stored under that name in the same directory as main.py) and imports the functions
- It sets up logging, meaning that all the logging statements will be written to a file called ‘twitter-bot.log’
- it defines a function that
- creates an api object
- initializes an object of class randomarticle (which automatically finds a random link)
- uses the
write_tweetmethod ofarticleto craft a tweet message - Tries to tweet our message using the api
- It executes that function
If all went well, running main.py should now result in a tweet with a random article from Slate Star Codex or Astral Codex Ten!
4. Automation
A bot wouldn’t be a bot if it didn’t run automatically. Originally, I wanted to create a serverless bot using Google Cloud. The reason I haven’t done that yet is because things get more complicated as we have to use a webdriver like selenium. I found a very nice article that explains how to do that, but for now I haven’t implemented that yet.
What I did instead is set up a cronjob. Cron is a linux tool that allows you to schedule tasks and execute them whenever you want. To make things easier I created a bash file called make_tweet.sh and stored it in the same directory as all the other files.
The make_tweet.sh file contains the following:
#!bin/bash

"path/to/the/directory/twitter-bot/bin/python" "/path/to/directory/main.py"
The first part is the path to the python instance within my virtual environment (which I had called ‘twitter-bot’) and the second one is the path to main.py. The reason I set this up like this is that my directory contains a space which makes some things more complicated. There are, of course, other ways to do this.
Now we can set up up a cronjob (you may have to install cron). To add a new cronjob, type in
crontab -eIf you don’t have any cronjobs already, you should see an empty window.
Now add the following line:
0 12 * * * /bin/bash /path/to/the/directory/make_tweet.sh >> /path/to/the/directory/cronlogs.txt 2>&1This will schedule a cronjob that runs make_tweet.sh every day at noon. In addition it writes any errors or similar to a file called cronlogs.txt within your Twitter bot directory. This way you should be able to check if something went wrong.
We’re done!
At least mostly. This setup forces you to have have your computer on every day at noon. If you’ve kept reading until hear I assume that will not pose much of a challenge to you, but it’s still not ideal. One possibility is to run this on a server or similar. I’ll dig into how to set this up on Google cloud and write a future post about. For now, enjoy your new Twitter bot!